Light gauge steel trusses can be created using a wide variety of proprietary systems and a common assumption is that all the trusses created using these systems cost the same. This is rarely the case. In fact, trusses designed with less-efficient systems can cost up to twice the amount of trusses designed with more efficient systems.
The cost of a truss is determined by the following variables:
steel cost (including the amount of steel and the unit cost of the steel)
cost of the connections used in the truss
labour costs to design, manufacture, assemble and install the trusses.
However, since truss systems use different truss profiles and connections (which may be screws, bolts, rivets, or sometimes even proprietary methods), it can be difficult to determine whether the trusses designed using your system are costing too much. Here are five things to check for to see if your truss system is costing you too much.
Web density is the number of webs that need to be put into a truss to make it structurally sound. Weaker truss systems require more webs to strengthen the truss, and more webs means more steel, more connections and more labour to assemble the trusses. The web density can be affected by the strength of the sections used in the truss webs and chords, whether the chords are used in their strong or weak axis and the strength of the connections used in the truss. Depending on the truss span, a truss that has twice the web density as another truss in a 22.5 degree roof will require approximately 30% more steel.


Standard gauges of steel used in trusses are 0.55 mm, 0.75 mm, 1.0 mm or even thicker. There are many factors that can drive the gauge of steel used in trusses. A thicker gauge of steel may be required either because a section of the truss or even a single connection fails.
As intermediate gauges of steel are not readily available, an increase from 0.75mm to 1.0mm means 33% more steel is required when keeping the same web patterns.
The factors mentioned above that drive web density can also determine the gauge of steel required. Even using one gauge of steel in the chords and another in the webs can make a large difference.
Different light gauge steel truss systems use different types of connections. Connections can be screws, bolts or even specialist rivets, and may also include stiffening gusset plates. It is important to easily and cost-effectively scale connections with loads. The truss system should have cheap connection methods for connections with small loads, but also options for much stronger connections where the the load is higher.
You can find out more about how testing reduces truss costs here.
Having only one type of connection (e.g. two screws or a bolt per connection) can be problematic. If the load is very light, an over-designed connection can increase the cost of the truss. Conversely, not having higher capacity connection options can mean trusses fail due to single connections that are just not strong enough. This scenario may mean that thicker gauge chords and/or webs are required to get the truss to pass.
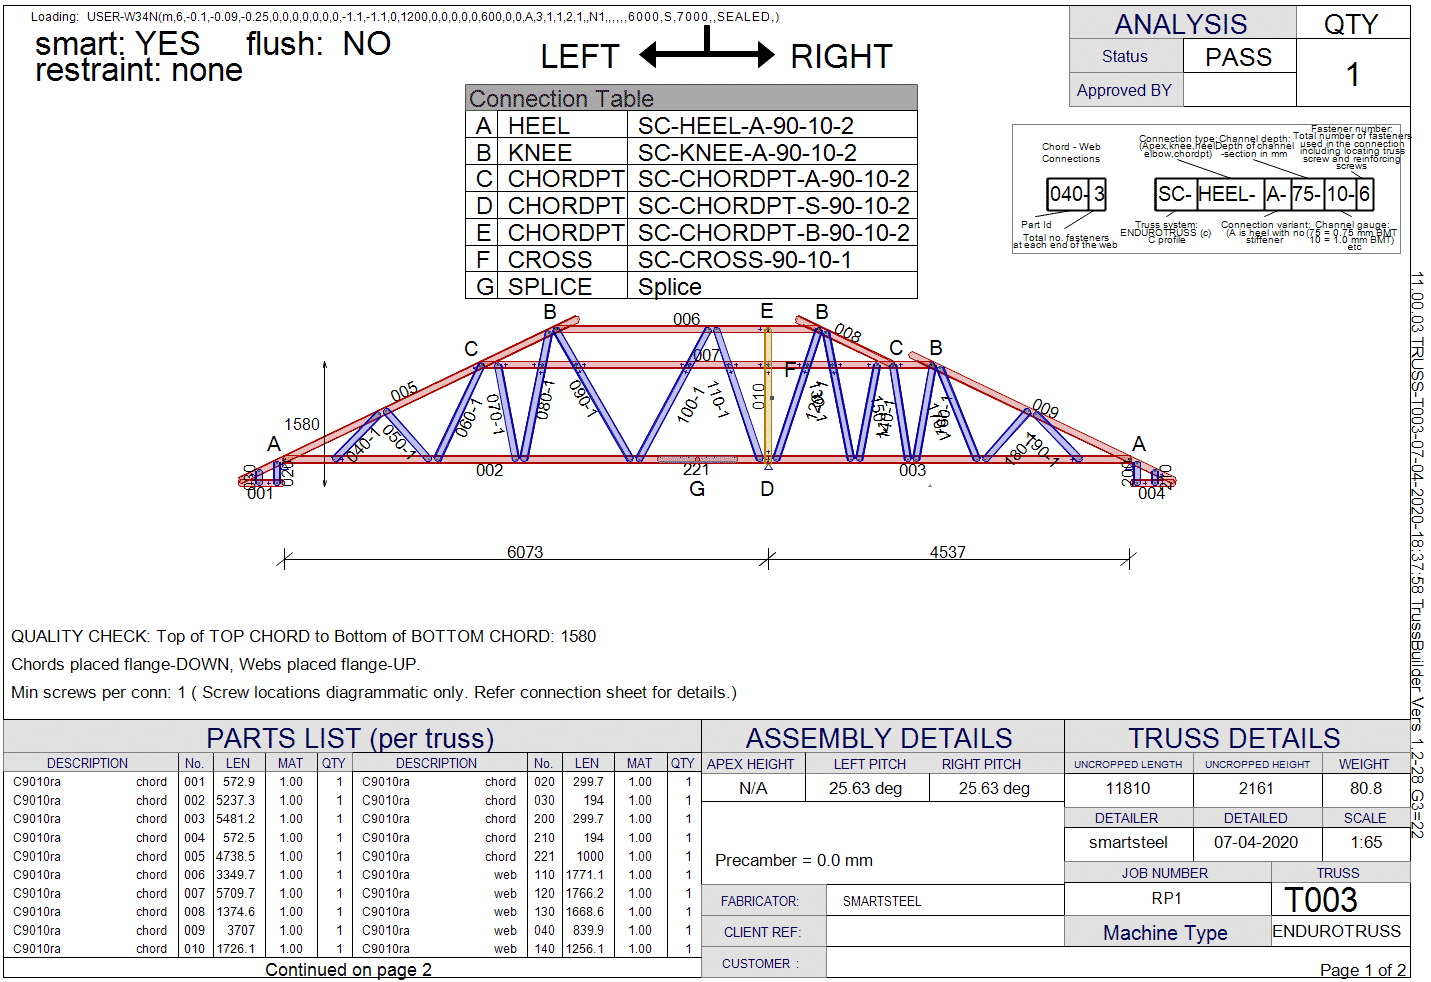
In this example, you can see multiple engineered connections being used on this truss.

Where roofs are not rectangular and valleys are required, there are two main ways to construct the roof:
Using saddle trusses on girder trusses doubles-up the amount of material (in the main trusses and the saddle trusses and any additional rafters). This also increases installation time because installers need to lay out both the main trusses and the saddle trusses.
Trusses that follow the roof shape have a more complex shape, but they use much less material. Additionally, installation time is lower because only the main roof trusses need to be laid out. Unlike timber trusses, which may require extensive jig setups to achieve complex truss shapes, light gauge steel trusses are self-jigging through the alignment of chords and webs with pre-punched locating holes.
Roof trusses need to withstand a variety of loads. One of the largest loads that a roof truss needs to withstand are loads from the roofing (in particular, tile roofing) and other equipment that may be incorporated in the roof. These loads do not vary over time and are referred to as ‘dead’ loads. When dead loads are applied to trusses they cause the truss to deflect. This means the truss must be designed to be stiff enough to not only deflect within allowable limits for dead loads, but also other loads as well.
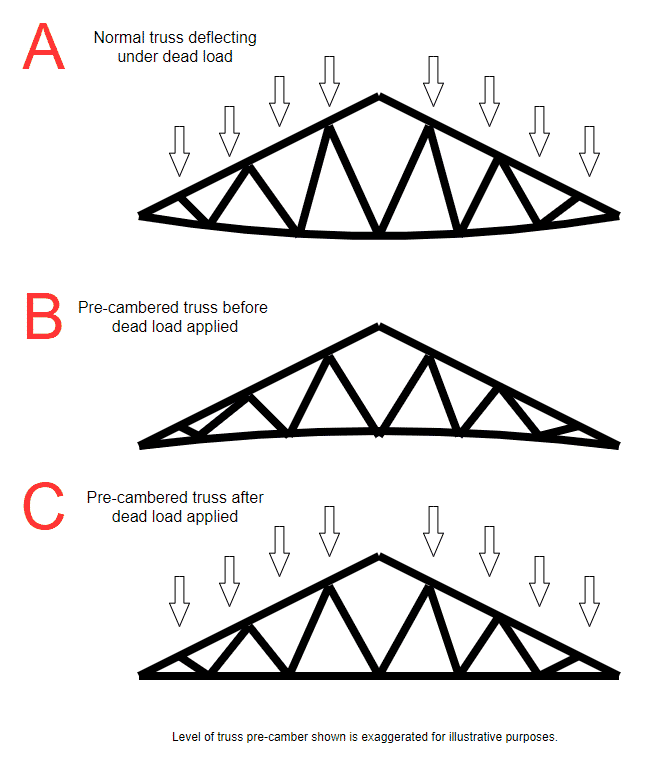
Truss A below shows what a standard A truss looks like deflecting under dead load.
Pre-cambering roof trusses is done by calculating the amount the truss deflects under dead loads and then shortening the truss webs so the bottom chord is cambered upwards – ‘pre-cambered’ – when it is manufactured. Truss B shows what a pre-cambered standard A truss looks like before any loads are applied. Truss C shows what a pre-cambered truss looks like after dead loads have been applied.

While it can be complicated to calculate, pre-cambering trusses is a relatively simple and cost-effective feature to incorporate into light gauge steel trusses which self-jig the truss shape.

Find out more about building the ENDUROTRUSS® system at https://enduroframe.com/building/. You can find out how to minimise the cost of roof trusses at this link.
ENDURO®, ENDUROFRAME®, ENDUROTRUSS®, ENDUROWALL®, ENDUROFLOOR®, ENDUROHUB®, ENDUROCADD®, TRUECORE®, BlueScope and the BlueScope brand mark are registered trademarks of BlueScope Steel Limited.
ABN 16 000 011 058
*Warranty currently offered for residential applications only and is subject to application and eligibility criteria. Commercial warranties may be available on application. For full terms and conditions and to determine the eligibility of your building for a warranty visit warranties.bluescopesteel.com.au or call BlueScope on 1800 800 789. Warranties provided by BlueScope do not affect consumer rights under the Australian Consumer Law.
Speak to an expert about how to get started making the ENDUROFRAME® system. Insert your details below and we will call you back.