Blog

How sophisticated testing leads to cost-effective steel trusses

How sophisticated testing and engineering leads to cost-effective light gauge steel trusses

A common misconception is that all light gauge steel roof trusses spanning the same distance and with the same loads use the same amount of steel. This is not true. Smart research and development in trusses and sophisticated software can provide reductions in steel usage of up to 50% compared to less efficient light gauge steel trusses.

The ENDUROCADD® design software has been developed over 20 years as a design tool for the ENDUROTRUSS® system, a key component of the ENDUROFRAME® building system.  Over this period the system has responded to changes in building construction, design standards and regulatory requirements.

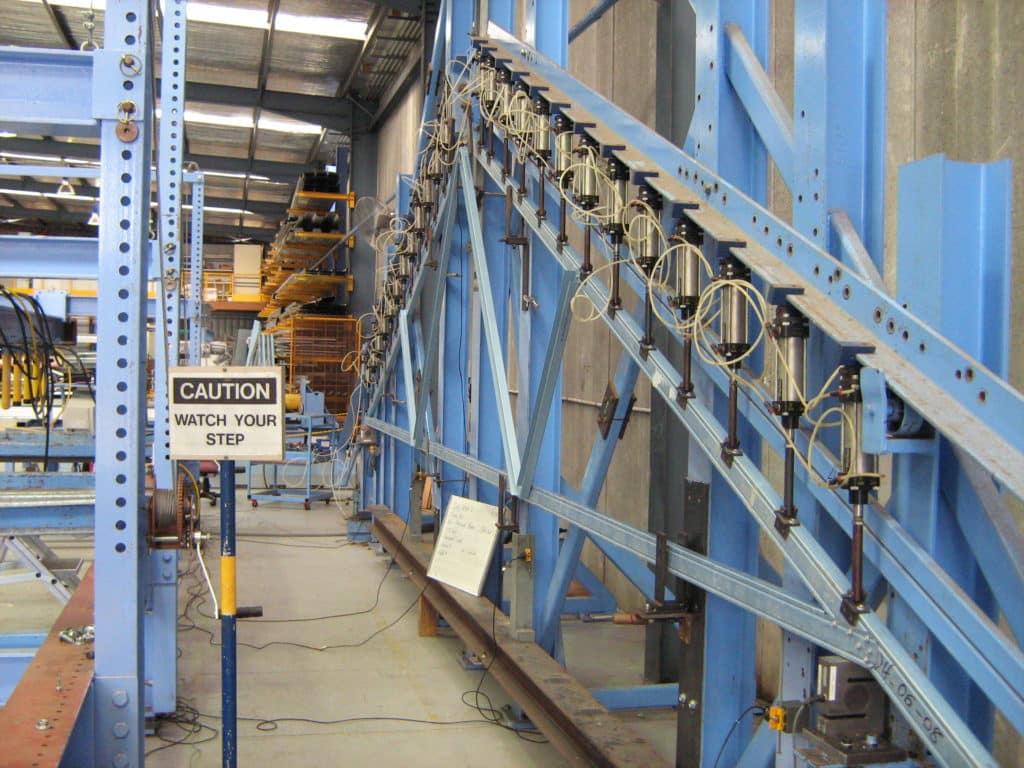
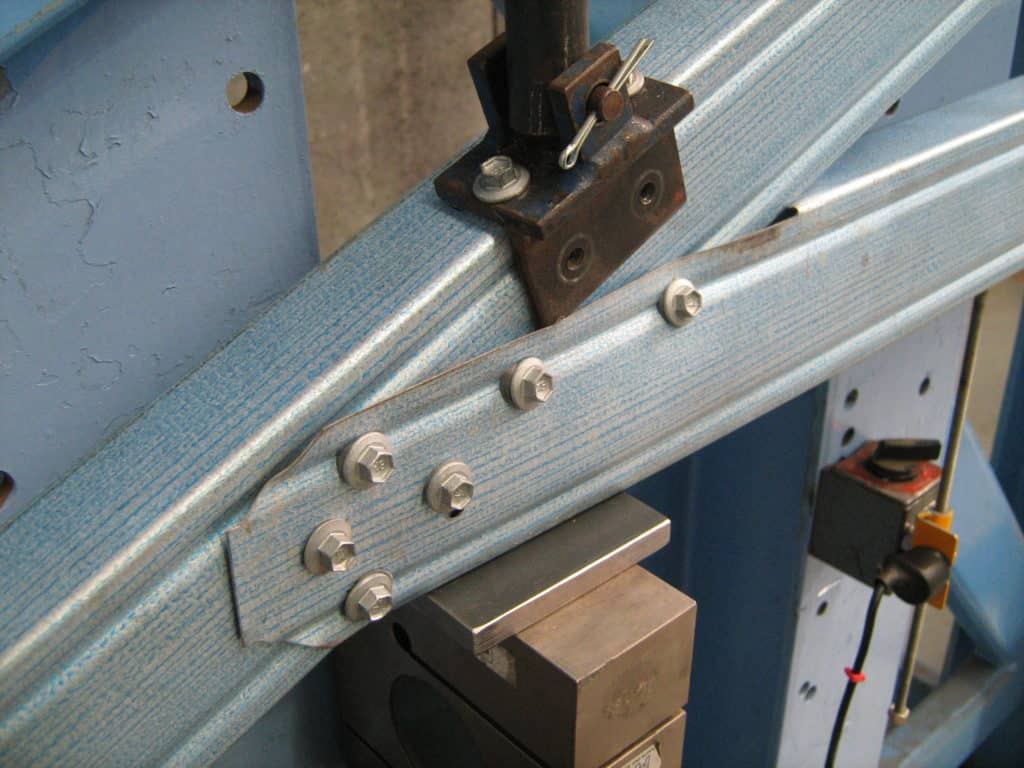
The foundation of this success is a commitment to extensive testing of truss connections and entire roof truss assemblies at our state-of-the-art NATA-accredited laboratory in western Sydney. All truss connections are tested in compliance with AS4600: Cold formed steel structures. Once the results have been verified the data is fed into our ENDUROCADD® software to provide efficient steel truss designs.
Putting our testing to the test

We are so confident in our testing that a decade ago we put forward the ENDUROCADD® software to be used as a test case for the drafting of the ABCB Protocol for Structural Software. This was a huge deal for our customers because under this Protocol, trained software users of compliant software applications are permitted to design and sign-off buildings that fall within the Protocol scope. Compliance with the ABCB Protocol for Structural Software means expensive and time-consuming engineering approvals can be avoided

The ABCB Protocol for Structural Software requires independent verification from a third party to ensure that software calculations comply with the Building Code of Australia (BCA) and Australian design standards. Swinburne University provides independently checks that the ENDUROCADD® software complies with the Protocol.

Working with the benefits of extensive testing

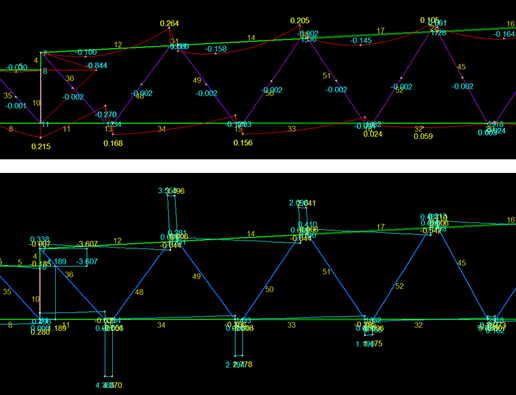
When you use the ENDUROCADD® software, you are presented with intuitive truss design functions that test every load case defined in the loading standards. The ENDUROCADD® software runs design and analysis for all members and connections which, in a typical truss, will be 112 load cases. This ensures that all required load conditions are considered and provides confidence that trusses are structurally sound.
 

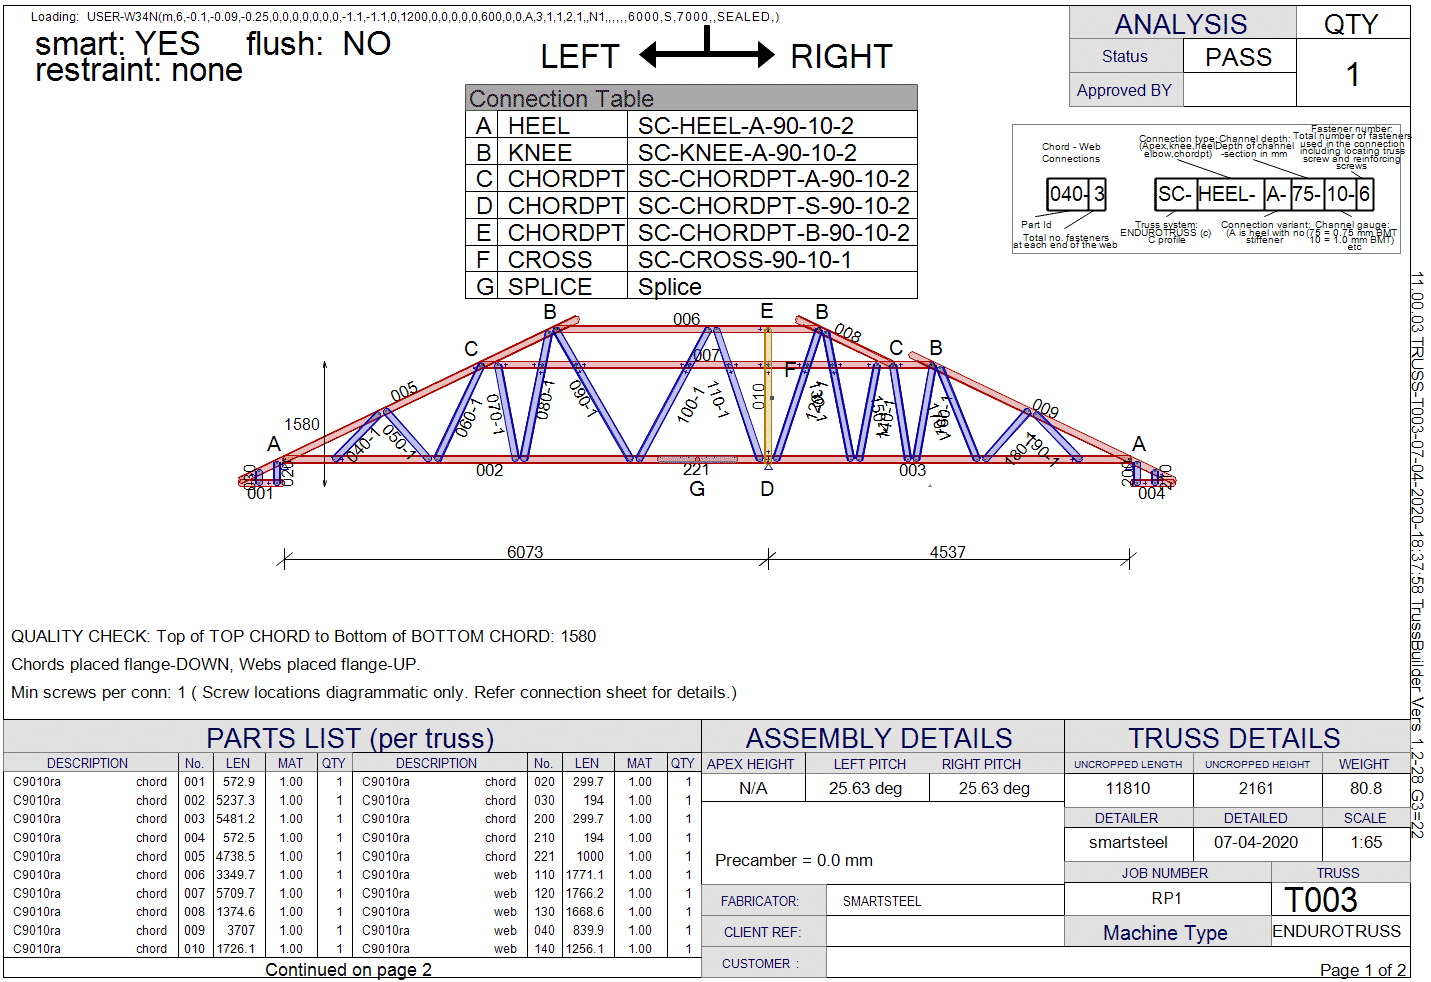
When your job is complete, you can view detailed connection drawings that show required screw types and their installation locations. Even better, when truss components are produced the number of screws required at each chord-to-web and chord-to-chord connection is inkjet marked on the parts. This avoids any confusion during assembly.

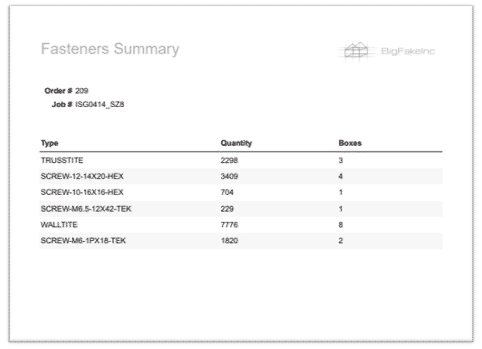
There are many connection options which include multiples of screws and different types of gusset plates to vary the connection capacity.  As there are about 2000 different connections, a summary sheet of the connections required for a specific job are generated for easy truss assembly.

Info icon_1

We believe the number of truss connections is the most of any light gauge steel framing system. This reduces the chance that connections are the determining factor in the truss strength and performance. In turn, this increases the cost effectiveness of the truss system. It is always cheaper to increase the capacity of a connection with a few screws than it is to increase the gauge of steel used in the entire roof truss.

Boxing Saving Costs

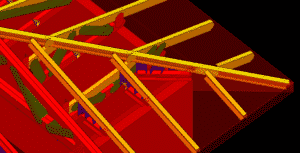
Boxing is another way the ENDUROCADD® software helps you reinforce truss chords and webs just where additional strength is required without increasing the overall truss gauge. Boxing is inserted on the reverse side of the truss to the webs and is precisely positioned where required to resist loads. In the diagram above, the darker section demonstrates the sections of truss chords that are boxed. In many cases chord boxing does not need to extend along the entire length of the chord. The boxing part is manufactured together with the truss and, unlike in-plane trusses, the boxing can extend across multiple sections of chords and webs. Pre-punched holes assist with the location of boxing on truss chords.

We’ve created a set of posters showing the assembly details for roof trusses. Sticking these up in your factory is a great way to keep everyone on the same page. See ENDUROTRUSS® fabrication posters.

Find out more about how the ENDUROFRAME® system reduces truss costs here.

For drawings and photographs that clarify truss construction, please read the ENDUROTRUSS® installation manual. See ENDUROTRUSS® Roofing System Installation manual.

Looking To Reduce Your Steel Truss Costs? Here’s How.​

Five ways to check whether your steel truss system is costing you too much

Light gauge steel trusses can be created using a wide variety of proprietary systems and a common assumption is that all the trusses created using these systems cost the same. This is rarely the case. In fact, trusses designed with less-efficient systems can cost up to twice the amount of trusses designed with more efficient systems.

The cost of a truss is determined by the following variables:

  1. steel cost (including the amount of steel and the unit cost of the steel)

  2. cost of the connections used in the truss

  3. labour costs to design, manufacture, assemble and install the trusses.

However, since truss systems use different truss profiles and connections (which may be screws, bolts, rivets, or sometimes even proprietary methods), it can be difficult to determine whether the trusses designed using your system are costing too much. Here are five things to check for to see if your truss system is costing you too much.

Number 1: Do the steel trusses have a high web density?

Web density is the number of webs that need to be put into a truss to make it structurally sound. Weaker truss systems require more webs to strengthen the truss, and more webs means more steel, more connections and more labour to assemble the trusses. The web density can be affected by the strength of the sections used in the truss webs and chords, whether the chords are used in their strong or weak axis and the strength of the connections used in the truss. Depending on the truss span, a truss that has twice the web density as another truss in a 22.5 degree roof will require approximately 30% more steel.

Truss with low web density
Truss with high web density

Number 2: Do the steel trusses use a thick gauge of steel?

Standard gauges of steel used in trusses are 0.55 mm, 0.75 mm, 1.0 mm or even thicker. There are many factors that can drive the gauge of steel used in trusses. A thicker gauge of steel may be required either because a section of the truss or even a single connection fails.

As intermediate gauges of steel are not readily available, an increase from 0.75mm to 1.0mm means 33% more steel is required when keeping the same web patterns.

The factors mentioned above that drive web density can also determine the gauge of steel required. Even using one gauge of steel in the chords and another in the webs can make a large difference.

Number 3: Do the steel trusses support multiple connection options?

Different light gauge steel truss systems use different types of connections. Connections can be screws, bolts or even specialist rivets, and may also include stiffening gusset plates. It is important to easily and cost-effectively scale connections with loads. The truss system should have cheap connection methods for connections with small loads, but also options for much stronger connections where the the load is higher.

You can find out more about how testing reduces truss costs here.

Having only one type of connection (e.g. two screws or a bolt per connection) can be problematic. If the load is very light, an over-designed connection can increase the cost of the truss. Conversely, not having higher capacity connection options can mean trusses fail due to single connections that are just not strong enough. This scenario may mean that thicker gauge chords and/or webs are required to get the truss to pass.

In this example, you can see multiple engineered connections being used on this truss.

Truss with multiple

Number 4: Can saddle trusses on girders be easily replaced with trusses following the roof shape?

Where roofs are not rectangular and valleys are required, there are two main ways to construct the roof: 

  • a girder truss with a second layer of saddle trusses sitting on top of the girder truss (it may also include a layer or rafters to support the saddle)
  • roof trusses that follow the shape of the roof.

Using saddle trusses on girder trusses doubles-up the amount of material (in the main trusses and the saddle trusses and any additional rafters). This also increases installation time because installers need to lay out both the main trusses and the saddle trusses.

Trusses that follow the roof shape have a more complex shape, but they use much less material. Additionally, installation time is lower because only the main roof trusses need to be laid out. Unlike timber trusses, which may require extensive jig setups to achieve complex truss shapes, light gauge steel trusses are self-jigging through the alignment of chords and webs with pre-punched locating holes.

Example of roof with saddle trusses

Example of roof with trusses that follow the roof line

Number 5: Is truss pre-cambering supported?

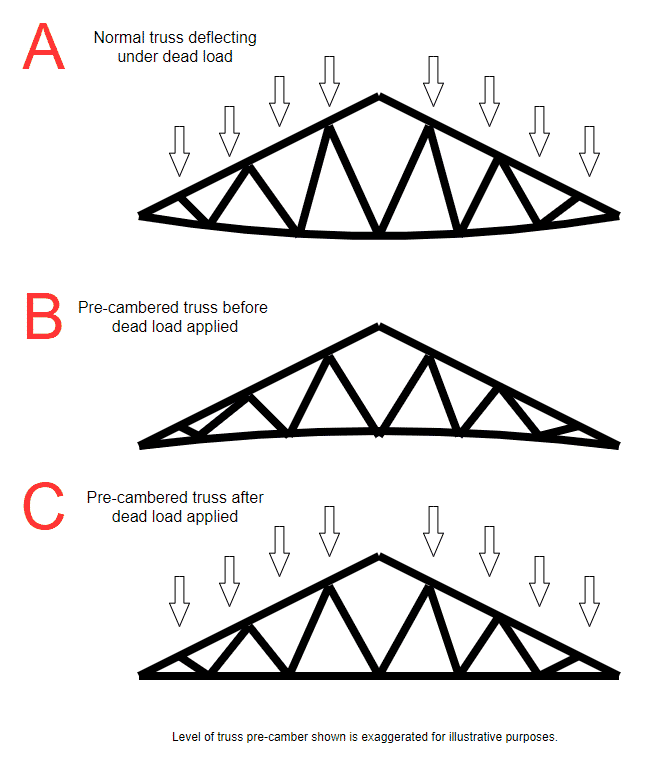
Roof trusses need to withstand a variety of loads. One of the largest loads that a roof truss needs to withstand are loads from the roofing (in particular, tile roofing) and other equipment that may be incorporated in the roof. These loads do not vary over time and are referred to as ‘dead’ loads. When dead loads are applied to trusses they cause the truss to deflect. This means the truss must be designed to be stiff enough to not only deflect within allowable limits for dead loads, but also other loads as well. 

Truss A below shows what a standard A truss looks like deflecting under dead load.

Pre-cambering roof trusses is done by calculating the amount the truss deflects under dead loads and then shortening the truss webs so the bottom chord is cambered upwards – ‘pre-cambered’ – when it is manufactured. Truss B shows what a pre-cambered standard A truss looks like before any loads are applied. Truss C shows what a pre-cambered truss looks like after dead loads have been applied.

Info icon_1

While it can be complicated to calculate, pre-cambering trusses is a relatively simple and cost-effective feature to incorporate into light gauge steel trusses which self-jig the truss shape.

ENDUROCADD® Release V11.01.32 Release Highlights

Overview of Updates in ENDUROCADD® Software V11.01.32

ENDUROCADD® Software Release V11.01.32 comes with many highly sought after features. This new release comes free to ENDUROCADD® software licensees and can be downloaded by clicking on the Options >> Update.

Changes to Trusses

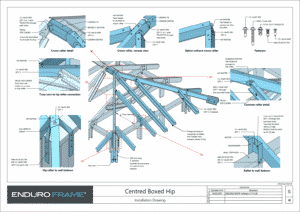
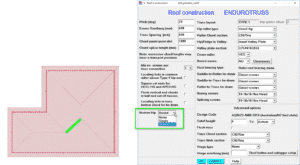
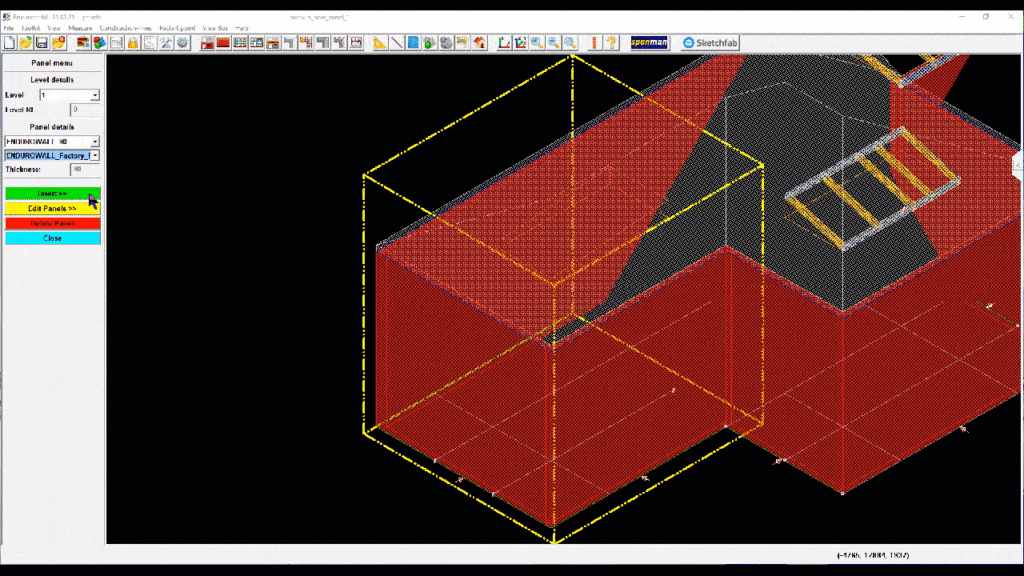
Centered Boxed Hip Rafters Added

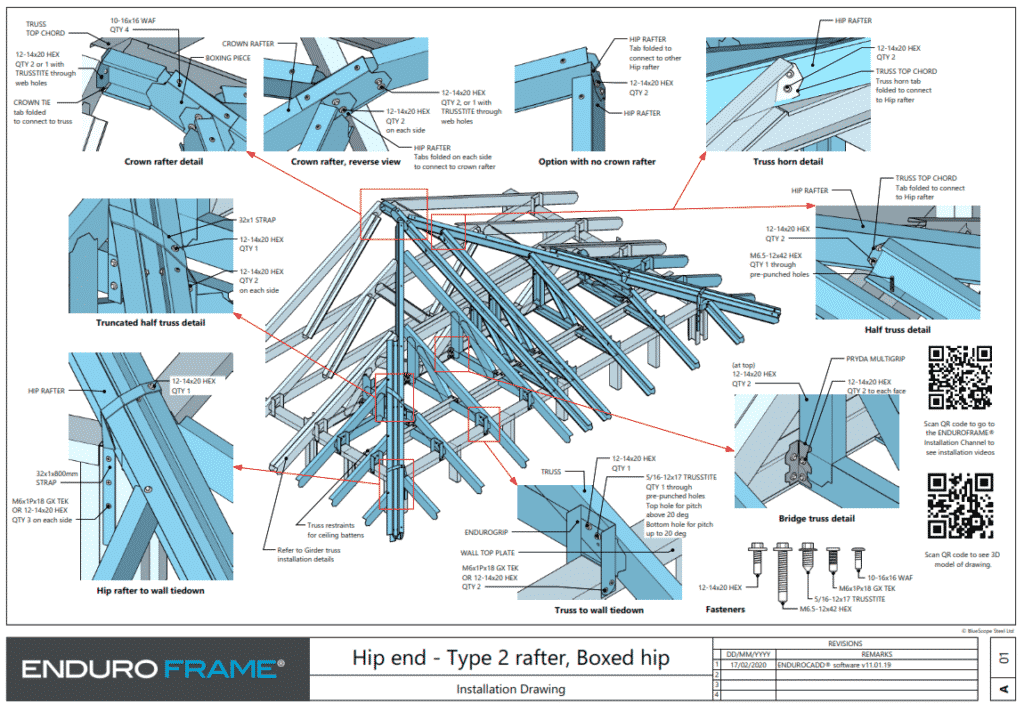
A new style of boxed hip rafters has been added with many new features. This feature can be selected in the roof construction menu and there are details available for download to provide to site to show how to install from this link.

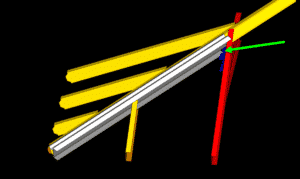
Boxed hip rafter U notch

There is now a notch in the U section of boxed hip rafters to make it easier to position the boxed hip rafter against truncated truss horns.

Truss hip rafter heel height

Hip truss heel height now matches the heel height of the roof block.

Broken hip options

There are now different options for broken hips in the Roof construction window.

The default option is Boxed to keep it consistent with older jobs.

Truss differential deflection check

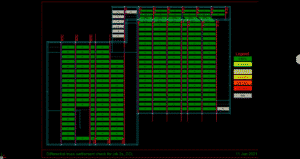
New check for Differential Deflection between Bottom Chords of adjacent trusses (or) between Internal Truss and Gable end. Maximum allowable value is Nominal truss spacing /150 or 4 mm whichever is less.

This check is not included in truss certifications (yet). Have a go and let us know what you think.

Changes to Floors

Floor joist end chords

End chords for None intermediate floors will not be built as wall parts anymore. End chords for floor joists are now built in the floor joist when the supporting wall’s intermediate wall detailing options are set to None.

End chords will also be built in joists supported by Wall Others. 

Need to update floor joist end chords? Follow this tutorial, Update identical floor joist end chords.

Changes to Walls

Bottom plate uplift calculation

In v11.01.32, the Uplift reactions on the bottom plate in the ENDUROCADD® software has been improved to ensure that there is clarity around how uplift values are calculated and consistency between the uplift values and the location and type of tie down that is applied at stud locations in bottom plates.

General

Sample jobs and detailing options

There are now sample jobs and detailing options included in the ENDUROCADD® software.

These sample jobs act as a reference for future jobs and are especially useful for new licensees to see detailing options and auto-opening and auto-tiedown options pre-configured.

System settings popup at update/install

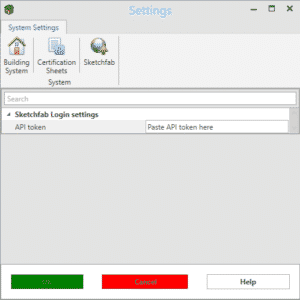
When you install/update ENDUROCADD, the settings window will popup. provides an opportunity to review system settings before starting a new job.

If no changes need to be made, please click Cancel.

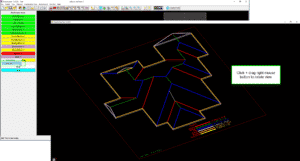
Sketchfab axes fixed

Sketchfab models are now uploaded the right way up. No need to edit axes before publishing the model.

The Sketchfab login settings that ENDUROCADD requires have been simplified too. You now only need to enter your Sketchfab API token.

Job variables

New and updated job variables:

V67

WALL

Walls, Load-bearing, Area of NEW

New job variables for ENDUROWALL and SUPRAFRAME walls only. Raked areas are calculated correctly and opening areas are included. These are the same values reported in job header sheets.

V68

WALL

Walls, Non-load-bearing, Area of NEW

V100

ROOF

Sloping area of roof UPDATED

Includes Outrigger and Gable ladder faces. Faces also counted in Statistics.

V102

ROOF

Plan area of roof UPDATED

Saddle areas are no longer counted.

V105

ROOF

Length of gables COMING SOON

This is the length of the roof along gables including dutch gables and dormers, including eave blocks.

V106

ROOF

Length of valley lines NEW

This reports the total length of valley lines in roof blocks, including eave blocks.

V107

ROOF

Number of valley lines NEW

This reports the total number of valley lines in roof blocks, including eave blocks.

V108

ROOF

Length of hip lines NEW

This variable reports the total length of hip lines in roof blocks, including eave blocks.

Note, this variable is different to V87 which reports the total length of individual hip rafter parts.

V109

ROOF

Number of hip lines NEW

This variable reports the total number of hip lines in roof blocks, including eave blocks.

Note, this variable is different to V88 which reports the total number of individual hip rafter parts.

V110

ROOF

Length of ridge lines NEW

This reports the total number of ridge lines in roof blocks, including eave blocks.

V111

ROOF

Number of ridge lines NEW

This variable reports the total number of ridge lines in roof blocks, including eave blocks.

View which lines are counted in the new roof shape job variables via Roof shape menu > View > Roof lines.

Plus, many many more exciting features! Find out more about the ENDUROCADD software.

ENDUROHUB Version 3 is here!

ENDUROHUB® Version 3 is here!

Hi everyone!

We’ve just released Version 3 of ENDUROHUB®, and with it comes some major behind-the-scenes improvements.

It might not seem like much has changed, but we’ve been working incredibly hard to bring you major improvements. These make ENDUROHUB® more reliable, faster and easier to use than ever!

As always, we’d love to hear from you about what you think of these ENDUROHUB® updates.

Here are some of the highlights…

Daily Automated Testing

We’ve implemented a daily automated testing routine that allows us to check if there are any issues that could affect production. To do this, we use a technique we like to call “Gold-Copy” testing.

In a nutshell, we create Orders using ENDUROHUB®, and generate the output Cutting Lists. We manually check and verify Cutting Lists, and if they are OK, make them “Gold-Copies”. The logic is that if we re-create the Cutting List, it should be exactly the same as this “Gold-Copy”.

The system will automatically notify ENDUROFRAME and tell us what the difference is so we can check if there is a problem (which greatly reduces the amount of time we need to identify the problem and fix it).

These tests run once per day, which means you can be more confident that we are proactively finding problems with ENDUROHUB®, rather than waiting for a problem to occur in production.

Automation for Split By Batches

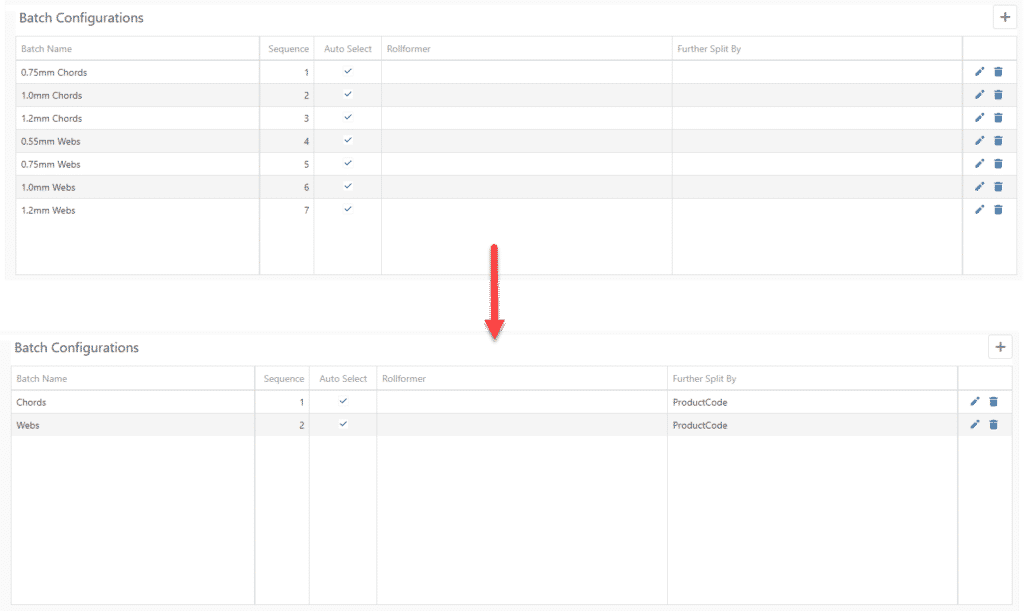
Batches has had several improvements made since its inception, one of which being the ability to “Split” batches by Level, Zone, or ProductCode. Some batching requirements are better suited to splitting rather than filtering such as the below:

Automation takes advantage of Batches, and with this release, now has the ability to automate SplitBy batches!

Find out more on Batching here: https://enduroframe.atlassian.net/wiki/spaces/ER/pages/1463091212/ENDUROHUB+-+Batching

Two-Factor Authentication

Two-factor authentication (2FA) adds an additional layer of security to the authentication process because it requires that you both know your password, but also have your access to your mobile phone. We have added this feature to keep your very important and valuable manufacturing data secure.


We’ve enabled 2FA for authenticator apps such as Google Authenticator, Authy, Microsoft Authenticator, among others.

We strongly recommend this security feature to all ENDUROHUB® users.

Upgraded ActiveReportsJS to v2.1

Our custom reporting solution makes use of ActiveReportsJS, and we have upgraded to its most recent version – see the Release Notes here: https://www.grapecity.com/blogs/whats-new-in-activereportsjs-2-1

With this feature you can develop your own great looking reports and directly print them from ENDUROHUB®.

Upgraded Application Framework

We build ENDUROHUB® using other software commonly used on the web. This makes it easier to bring more wonderful feature to you.

Those who look closely will see that ENDUROHUB® has a refreshed look and feel, and there are improvements in processing time.

Find out more here: https://docs.aspnetzero.com/en/aspnet-core-angular/latest/Change-Logs#10-2-0-2021-01-29

Other Improvements

We’ve also made countless behind-the-scenes improvements that will add to the reliability, performance and good experience.

How do I get ENDUROHUB?

Lodge a support ticket to our help system by clicking this link: https://enduroframe.atlassian.net/servicedesk/customer/portal/2/group/5/create/31

At this link provide your first and last name, email address, phone number, and the company you work for.

What do I need to do to upgrade to ENDUROHUB v3?

Nothing at all. If you’re using ENDUROHUB already, its been updated for you.

Where can I found out more?

You can browse the videos and tutorials and other help content here: https://enduroframe.atlassian.net/wiki/spaces/ER/pages/772243546/ENDUROHUB. You can contact us to help you with a specific question: https://enduroframe.atlassian.net/servicedesk/customer/portal/2/group/5/create/31

ENDUROHUB® Batching – Divide and Conquer!

ENDUROHUB® Batching - Divide and Conquer!

As manufacturing businesses grow, the cost savings that could be made by organizing manufacturing efforts grow. Methods that were once acceptable for smaller jobs become unmanageable in larger jobs (which are increasingly being undertaken by ENDUROFRAME licensees). This is where batching comes in.

One streamlining effort some licensees have chosen to pursue is to purchase additional rollforming equipment that is dedicated (for example) to truss components, and they also have corresponding downstream equipment such as truss fabrication tables.

This makes a lot of sense because the manufacturing cells can specialize in manufacturing trusses, and therefore truss fabrication itself becomes more efficient.

But in order for streamlining efforts such as this to turn into cost savings, a high level of organization is required to schedule production flows. Each manufacturing cell should be given what it needs in the optimal sequence and at the appropriate time, otherwise the potential efficiencies gained by specialized equipment can quickly erode away.

This is the fundamental purpose of Batching. It used to organize.

In the most simple terms, Batching is used to subdivide Orders into smaller “batches”, so that different parts of an Order can be manufactured:

  • On different machines,
  • At different times, or
  • In different sequences

It can also be used purely for organization purposes – e.g. some businesses prefer to divide an Order into Roof/Panel/Joist because it allows the scheduler to give simple verbal instructions to the Rollformer operator:

“Make the Roof now, we’ll do Panel and Joist tomorrow”

— scheduler

Without creating separate batches, the Rollformer operator has to make sense of this instruction from the schedule, and figure out which parts in a Cutting List should be rollformed and which should not.

What is a Batch?

A batch is a list of Parts. When an order is created, all parts are in a single “default” batch. But so as to better organize an Order you might choose to make additional batches and move Parts to them.

Each batch tell us:

  • Which parts are in the batch?
  • What sequence will parts within the batch be rollformed in?
  • On which Rollformer will those parts in the batch be made?

In the future, we may look at adding date/time scheduling to ENDUROHUB, so a batch would specify when parts would be made.

Common Uses

There are many scenarios where batching can be helpful. Some examples of where batching could be used:-

  1. You want to make all of the walls and floor joists for level 1 but not for level 2 as they do not need to be delivered until next week.
  2. You want to group all of the C90 1.0mm studs from a single job into a batch so they can be rollformed after another job that also has C90 1.0mm studs.
  3. You have several rollformers that are dedicated to manufacturing certain parts. For example; truss chords will be made on one machine, but webs will be made on another rollformer from longest to shortest.

(more…)

Version 11.01.21 Release Highlights

Version 11.01.21 Highlights

Performance

We are always looking for opportunities to speed up ENDUROCADD.

Here are three ways we have improved performance in this update:

We have reduced the number of times the job is saved during the Detail process.

The pdf export feature now excludes any items smaller than 0.5mm. If you usually have ‘wall components’ or dxfs shown in layouts you’ll notice a big improvement here.

We have also made a change to reduce the ImportV6.exe application’s CPU usage.

Job name length

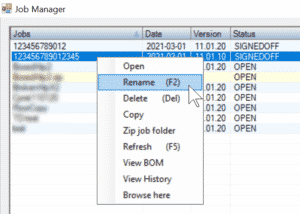
New job names have always had a character limit of 12 characters. This is to avoid problems with printing on parts, HMI and ENDUROHUB compatibility. This character limit is now enforced in ENDUROCADD. If you try to open a job with a long name, a popup will prompt you to rename the job folder or zip file to a shorter name first. The easiest way to do this is via the job manager. Right-click on the job and select Rename.

Job manager can shorten file names

Sketchfab

Due to the increasing usage of Sketchfab by licensees we have now automated the process to output files from the ENDUROCADD® software directly into Sketchfab. The output file is optimised for Sketchfab, and automatically uploaded into Sketchfab.

Notification Board

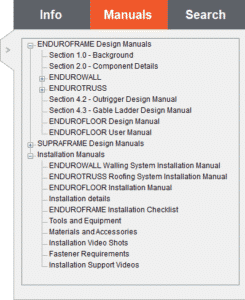
To make it quicker to navigate to design manuals, we have added a new tab to the notification board. All of the relevant design manuals are now available in the Notification board so with a single click you can go to the relevant manual.

Levels Improvements

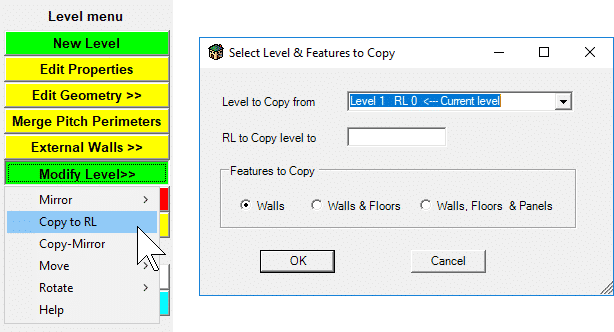
Copy Level to RL

The first stage of the Copy Level enhancement is complete. See EE-61 Copy Level, Walls, Openings, and Floor Properties . Speed up detailing of multi-level jobs with identical walls by using this feature to copy walls, panels and floor blocks to a new level at a set height.

Mirror progress

Gable ladders and panels now mirror with a job (mirror about an edge). Mirroring truss restraints, outriggers and ceiling bracing with a job is still in progress.

Walls New Features

Openings

‘Head height’ is renamed to ‘Stud opening head height’ in the Opening properties window.

Service holes

If you space Service Holes 150mm apart, the PSH (pair of service holes) NC data code is used instead of two SH codes. This works both for service holes added via the Wall editor or built using Wall detailing options.

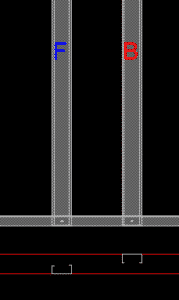
Front/back studs

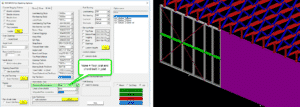
F and B indicators show which way studs flipped to front/back are facing in the Wall Editor and in Wall fabrication sheets.


Auto tiedowns in wall editor

There are a number of improvements to tiedowns in the wall editor which add more functionality to Auto tiedowns after the wall is built.

Tiedown type (anchor bolts etc):

  • Add or change tiedown type parts via the stud or stud tiedown right-click menu.

  • Tiedown type parts are deleted when their parent tiedown is deleted.

  • Tiedown type parts are flipped when their parent tiedown is flipped.

  • Tiedown types parts now move when their parent studs are moved.

Bracing stud tiedowns:

  • Bracing stud auto tiedowns are built when bracing is added. This works for all bracing – strap bracing, K bracing and panel bracing.

  • Jamb stud tiedowns are no longer superseded by bracing stud tiedowns when bracing is attached to jamb studs.

If you’ve been hesitating to use Auto tiedown configurations in you’re detailing process, now is a great time to start!

Refresh your memory at this page, Specifying auto tiedown configurations

Webbed walls

All diagonal members in Webbed walls are now the same length.

Webbed walls recognise Roof void blocks, ceiling blocks, and beams/walls as void blocks, although you might want to tweak by adding diagonal studs or removing additional vertical studs.

Panels

When you change a panel’s detailing option, it will now rebuild immediately.

Previously used panel detailing options are used by default when inserting new panels.

When adding a panel to a plane, there is a prompt to select whether to build the panel above or below the selected plane.

Floors New Features

Deflection Checks

There has been a change in floor joist deflection checks which have been brought in line with the NASH standard requirements and are slightly less stringent which, in turn, will improve spans of some floor joist configurations.

Loads of balcony zones also appear on the User Load Layouts floor certification sheets along with other user applied loads.

For a full list of release notes go to the ENDUROCADD Help System.

New Installation Details

Type 2 Hip End Installation Detail available for download

Find out more about the benefits of the ENDUROCADD® software

The ENDUROCADD® software is rich in features to automate the design of light gauge steel buildings.

Find out more

Speak to an expert about how to get started making the ENDUROFRAME® system. Insert your details below and we will call you back.